Makeup By Kim Porter

blog

The Blog

Review: Tria Skin Perfecting Blue Light *Update* & Cyber Monday Deal


It has been a little over one month since I’ve been using the Tria Skin Perfecting Blue Light.  As mentioned in my introductory post, I don’t experience serious breakouts; however there are areas, such as my forehead and chin that are at times problematic.  For the last month or so  I have concentrated my treatment on these areas.  Sometimes I did the treatment twice per day (morning and evening) for 2.5 minutes or 5 minutes in the evening.  After a week or two of using the Tria Skin Perfecting Blue Light device breakouts in the affected areas cleared up. 

Tria Skin Perfecting Blue Light


I know the Tria Skin Perfecting Blue Light device works because when I stopped using it, the same areas began to break out yet again.


Tria Skin Perfecting Blue Light
It dried up the breakouts, but, left my skin dry, too.


One of the side effects Tria mentioned may happen was dry skin.  Unfortunately, I was one of the people to experience.  My suggestion is to stay hydrated from the inside by drinking lots of water, and using a good moisturizer.   Another suggestion I have is to make sure, prior to using this device, your skin is dry.  If your skin is the least bit damp the Tria Tria Skin Perfecting Blue Light will not glide easily over your face, it will skip around and tug, which isn’t good for your skin.

My only gripe with this device is the battery life.  I hate that it does not hold its charge.  After at least two days of using it twice per day, I have to recharge it.  At one point the device stopped because the battery was dead right in the middle of my treatment.  I hope Tria works on that.


Deal! Deal! Deal!

$100 off all purchases of the Tria Hair Removal Laser and Skin Perfecting Blue Light.

When:  11/21/2012-11/27/2012.

Code:  SHOP100 at checkout  at http://www.triabeauty.com 


Find Tria Beauty on Social networks

Twitter: @TriaBeauty

Facebook: https://www.facebook.com/triabeauty

Disclosure: The product mentioned in this post was sent to me by the company or its PR representation for review consideration. I will be entered into a contest for writing subsequent reviews on this product. These are my honest opinions.

FOTD: Neutral, Smoky Eye using OFRA Cosmetics Pro Palette

This is yesterday’s face of the day (FOTD) that I posted on Instagram.  I used my OFRA Cosmetics Pro Palette (see here).  I can’t get enough of it.  If you have the Urban Decay Naked Palette it should be fairly easy for you to recreate this look.  I actually regret not buying two; one for my kit and one for myself.  Oh well, I have the next The Makeup Show New York to purchase one if OFRA Cosmetics is there.


Tools:

I know I normally do not add the tools I use; however, I know it can be beneficial to some people, especially if you have brushes you don’t know how to use.  If you are comfortable using a certain brush for a different purpose you’re welcome to. There are no real rules in makeup.

Real Techniques Brushes: 

-Expert Face Brush

-Setting Brush

-Shading Brush

Bdellium Tools 714 Brush

Sigma Makeup SS224 Brush (include affiliate link) – It is now the E40 brush

Sigma SS219 (Pencil Brush) – It is now the E30 brush

IT Cosmetics No-Tug Heavenly Luxe Dual Eyeshadow Brush


Eyes:

Ruby Kisses Eyeshadow Magic Primer

OFRA Cosmetics Pro Palette

-Peachy Color (Lid & up to brow bone)

-Bronze (Crease)

-Gold (Outer V)

– Matte Black (Crease)

Laura Geller “Baked ImPRESSions Eye Palette” – Espresso Yourself

-Soft Brown (crease for blending)

Physicians Formula Eye BOOSTER 2-in-1 Lash Boosting Felt-Tip Eyeliner Serum

IT Cosmetics Bye Bye Under Eye Concealer (Review Here)

Laura Geller WOW Factor Mascara


Brows:

It Cosmetics “Bye Bye Under Eye Concealer” – Deep

Laura Geller “Baked ImPRESSions Eye Palette” – Espresso Yourself

-Dark Brown


Face:

OCC Tint – Y5

IT Cosmetics “Bye Bye Undereye Concealer “- Deep

Tart Smooth Operator Micronized Clay Finishing Powder

Elf Blush – “Blushing Rose”

Bronzer from the OFRA Cosmetics Pro Palette

WEN Replenishing Mist – “Lavender”

Lips:

Kissable Couture Lipgloss – “Hyacinth”


FOTD: Meow! My Halloween Makeup Look

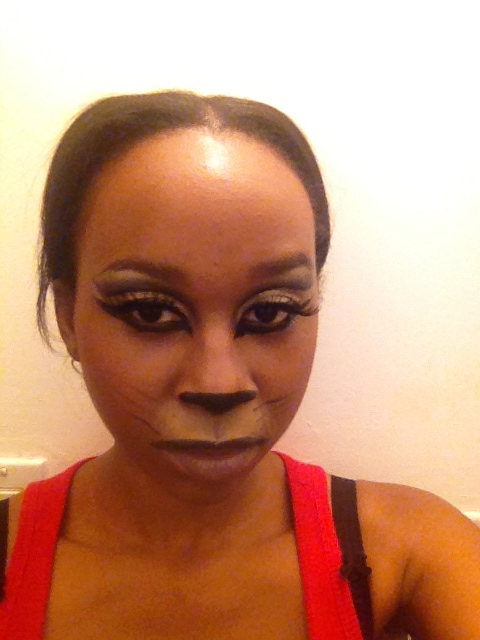
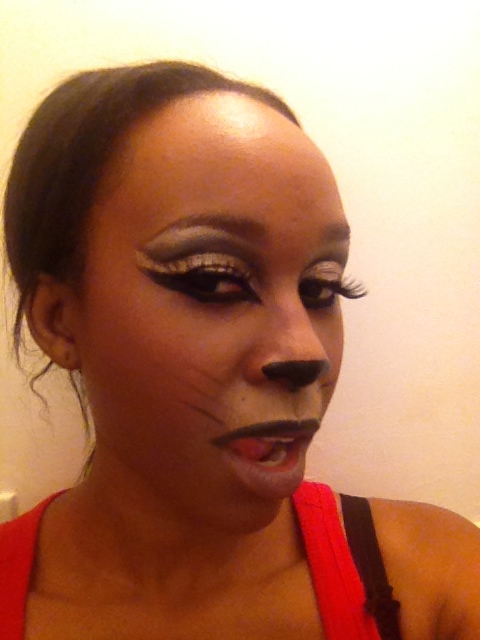
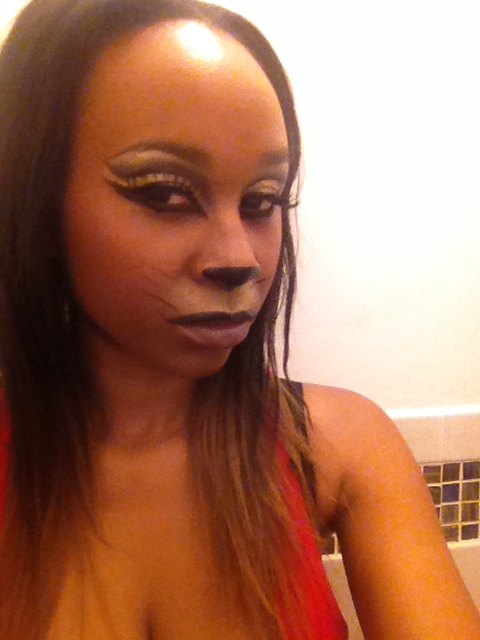
Normally, I do not do anything for Halloween.  I just haven’t been into it.  This year, since a local beer garden was having a Halloween party, I was bored and needed to practice my skills, I decided to turn myself into a kitty cat.  All I needed were the ears and tail… After I was complete with my kitty makeover, my daughter woke up from her [short] nap and looked at me like I was nuts!

This is my finished Halloween Makeup Look…


Below is the list of products I used for my Halloween Makeup Look

Eyes

UDPP – “Sin”

Stila Smudge Stick Waterproof Eyeliner – “Stingray” (Thin line drawn on crease)

OFRA Cosmetics Pro Palette

-Champagne Color (Brow Highlight)

-Charcoal Grey (Crease)

LIT Cosmetics Glitter – “Cowgirl”

MAC Fluideline – “Blacktrack” (Lower and upper lashline)

Red Cherry Eyelashes  – #5

Duo Adhesive


Face:

OCC Tint – Y5

Graftobian HD Foundation

-Desert Sand (Above Cupids Bow)

-Burnt Amber (Nose Contour)

NYX Jumbo Pencil – “Black Bean” (nose)

MAC Fluideline – “Blacktrack” (to create “whiskers”)

Lips

OCC Liptar

– “Tarred” (Upper Lip)

– “Memento” (Lower Lip)


Brushes

Real Techniques Brushes:  Expert Face Brush, Setting Brush, Shading Brush

Bdellium Tools 714 Brush

Sigma Makeup SS224 Brush  (It’s now their E40 Tapered Blending Brush)

Angled Liner Brush

What was your Halloween Makeup Look?

Reviving Dried Out Gel Eyeliner

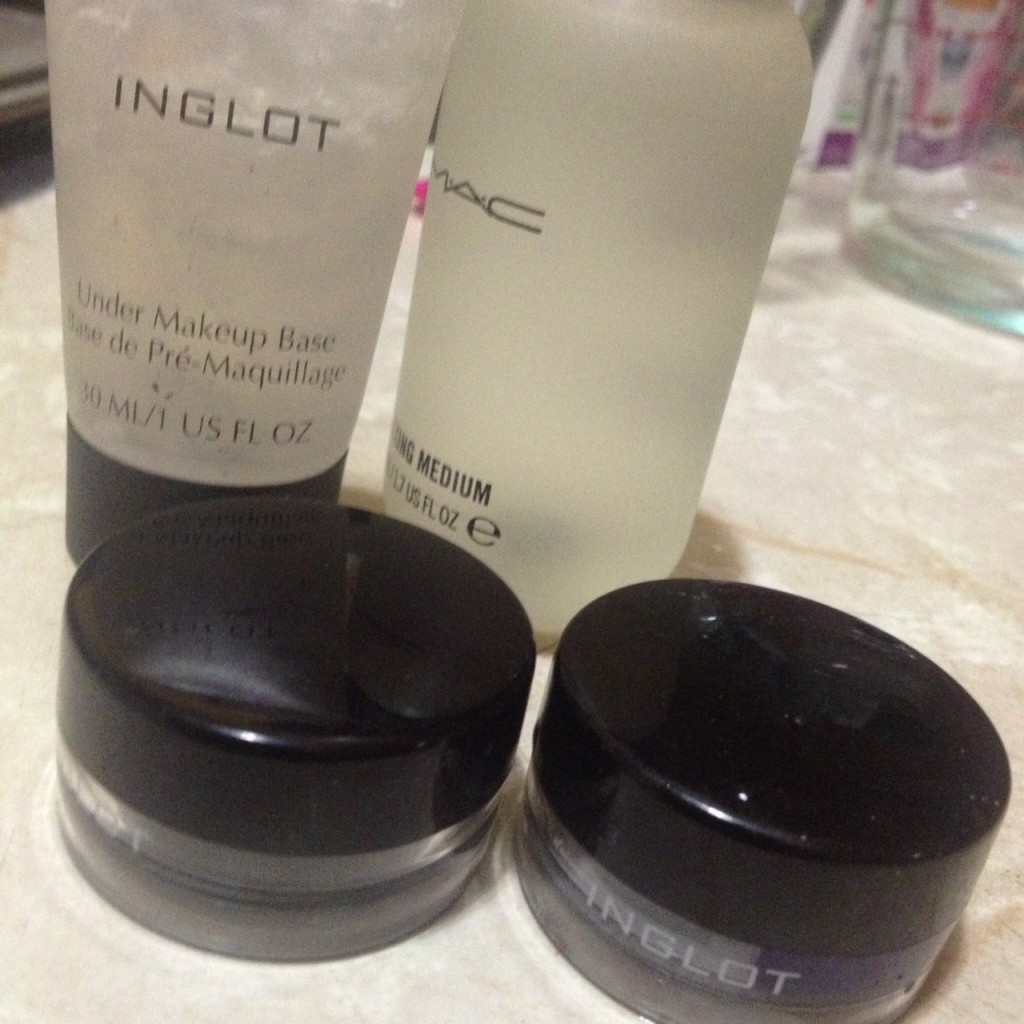
Over the weekend I decided to revive my dried out Inglot Gel Eyeliners.  I haven’t had this issue with my MAC gel eyeliners nor with my Ruby Kisses ones, so I wonder why these dry out so quickly??? I’ve only used them a few times, too.  I love the pigment of them, and when they were “fresh”  they applied smoothly.  Most people probably would have chucked theirs, but, I loved them too much to part.  And thanks to a video by Enkore Makeup (Koren Zander), I was able to revive my gel eyeliners.


What I used:

MAC  Water-based Mixing Medium (PRO Only)

INGLOT Face Primer (any silicone primer will do)

Spatula

1/4 size teaspoon

Gel eyeliner


How I did it

In Enkore’s video he used a blow dryer to heat the dried gel eyeliner.  You can also use a microwave, which I ended up doing since it is less noise.

First, I combined the mixing medium and the primer into the 1/4 teaspoon and stirred it up together with a toothpick.  After those two were mixed together, I poured the mixture into the dried out gel eyeliner.

After pouring the mixture into the dried out gel eyeliner I stirred it up with the spatula making sure everything was mixed well.  I then placed it into the microwave for 20 seconds (it didn’t bubble it just melted). I took it out of the microwave again, and mixed it up then repeated the microwave process for 20 seconds then mixing and repeating those steps until I achieved my desired consistency.

After that, I smoothed it out, and cleaned up the edges with a q-tip, and let it cool.


I wound up reviving all three of my INGLOT gel eyeliners. I’m happy I was able to make them like new, especially my black one.


When your gel eyeliners dry out, do you throw them away or revive them?