Makeup By Kim Porter

makeup tips

Then vs Now: How my makeup has changed in my 30’s

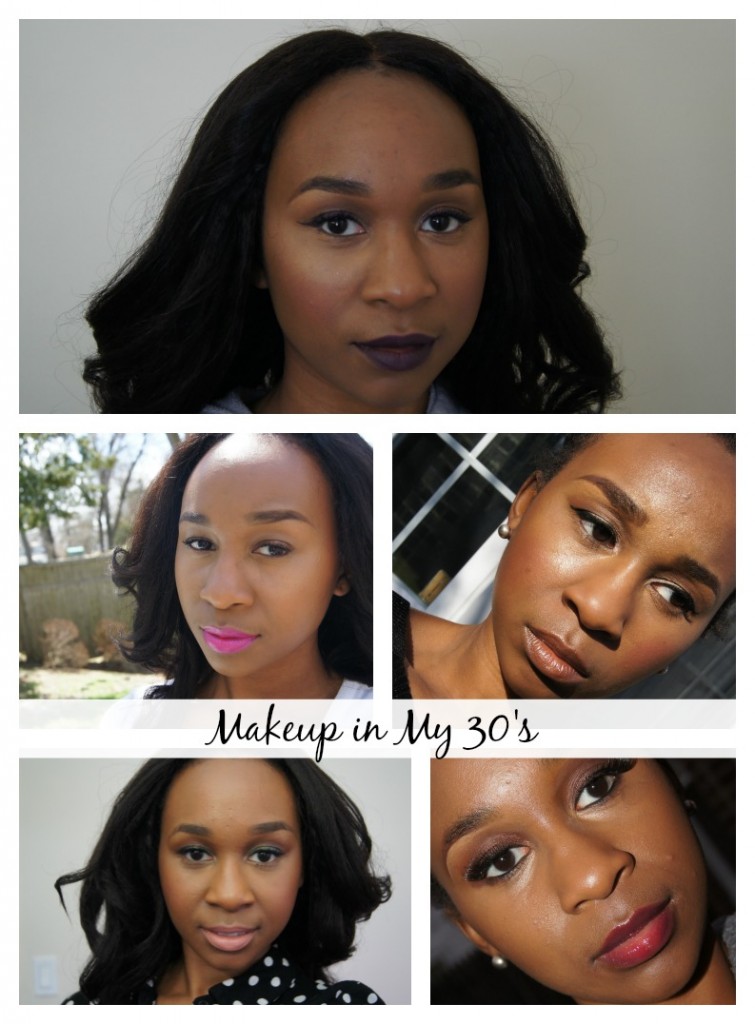
Then vs Now Makeup in my 30s

There’s something that happens to us as we get older.  Things tend to change. If they don’t then there’s something wrong with you.  #KiddingNOTKidding Seriously, people tend to learn from the mistakes they’ve made as youths, and work on improving those things as they get older. The same thing goes for people in the makeup world, whether you’re a makeup artist or enthusiast, you’re sure to have noticed a change in the way your makeup looks now versus lets say, 5 to 10 years ago.

I didn’t start wearing makeup until I was 18, which was for my high school prom.  This makeup consisted of powder, gold eye shadow, mascara, and a gloss. And then, something happened, I began to experiment with different colors, foundation, lipsticks, blushers and bronzers; I was obsessed. I turned my obsession into a passion, and began blogging and doing makeup. Now that I am fresh into my 30’s, it seems like I’m back to where I started – back to neutrals. One thing I noticed about my makeup versus then and now, is that I am more of a ‘Less is more’ kind of gal woman.

What am I doing differently with my makeup now that I’m in my 30’s? Keep reading to find out.

Looking back at my old makeup posts and tutorials, I was into very colorful makeup. I was younger, and didn’t I mind experimenting with color to create colorful [outrageous] looks. I remember the huge lashes I loved to wear.  OMG! I look back at photos, and I think I look completely ridiculous.  Even my eyebrows went through some major changes. They’re no longer heavily drawn on. They have a softer more natural look.

These days, I’m not sure if it’s the mom in me, or if I’m becoming more conservative, or maybe it can be attributed to me not having more time to dedicate to putting on loads of makeup, but one thing I noticed is that my makeup in my 30’s is more on the neutral side.  Sure, I will add a pop of color with a colored eye pencil or even a bright lippie, but, that’s probably the most I will do. I honestly do not have the time for anything else, especially during the week.

Makeup in my 30s collage

My goal for my makeup look, especially for work and casual wear, is to look more polished than made up.  Below are some of my makeup staples for an everyday face.

  • NARS All Day Luminous Weightless Foundation (review)
  • La Girl Pro Concealer (review)
  • Anastasia Beverly Hills Dip Brow (review) or IT Cosmetics YBBB Brow Pencil (review)
  • Too Faced Better Than Sex Mascara (review) or tarte Lights Camera Lashes
  • Guerlain Terracotta Bronzing Powder #7
  • Anyone of my favorite colored lippies for a pop of color or if I want a straight nude/neutral look, I opt for the NARS Audacious Lipstick in Raquel (review).


I’ve shared how my makeup look and routine have changed since hitting 30. I would love to hear about your experiences, too.

Have you noticed that your makeup look has changed as you aged? If so, I’d like to hear how. If it hasn’t I’d love to hear about that, too!


Create a Flawless Face in Under Ten Minutes

Create a Flawless Face in under ten minutes

I BOUGHT THIS | AFFILIATE LINKSAFFILIATE LINKS


Let’s face it, we are all busy, especially during the week when we’re getting ourselves and our kids ready for school and work.  Really, when do we have time to put on a full face of makeup with highlight and contour, and all of the other Instagram-famous makeup trends? Truth is, we don’t.  At least I do not.  However, I’m a firm believer in keeping up appearances whether it’s just by adding a little mascara, lipstick or lip gloss.  I’ve also found that with just a few essential products, anyone can create a flawless face in under ten minutes.

I’ve put together this list of products you or anyone else can use to create a flawless face in under ten minutes.

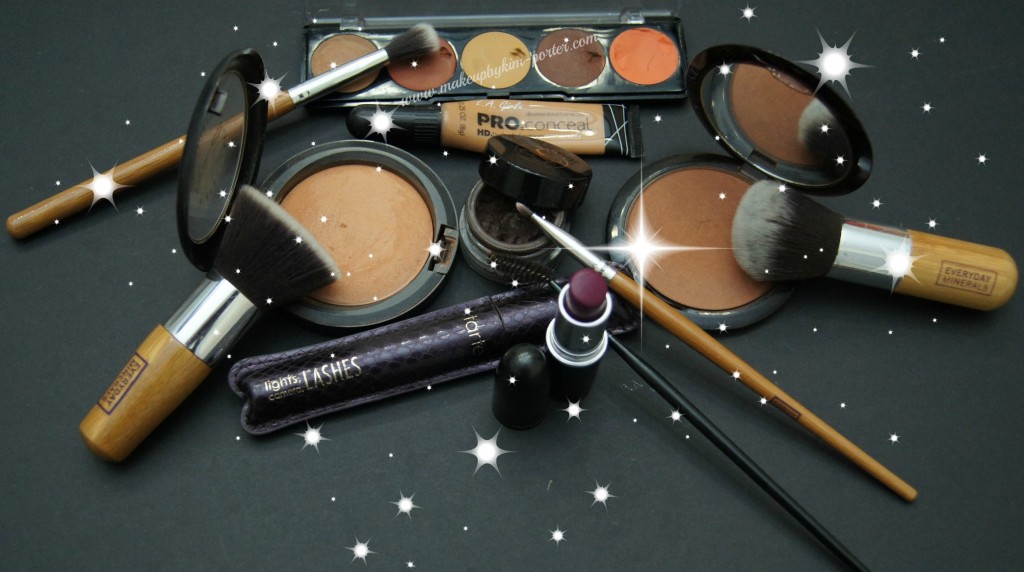
Products used to Create a Flawless Face in Under ten Minutes

Sidebar: I know I don’t have to say this, or maybe I do, but please, please remember whenever you’re applying makeup to make sure you’re applying it over clean, moisturized skin.  I can hear an oily girl saying, “Well, my skin is oily, I don’t need moisturizer.” That’s false. Oil and moisture are completely different things. Just take my advice and moisturized. Your skin will love you.

Now back to the list of products to create a flawless face in under ten minutes.


Create a Flawless Face in ten minutes or less _Pictorial

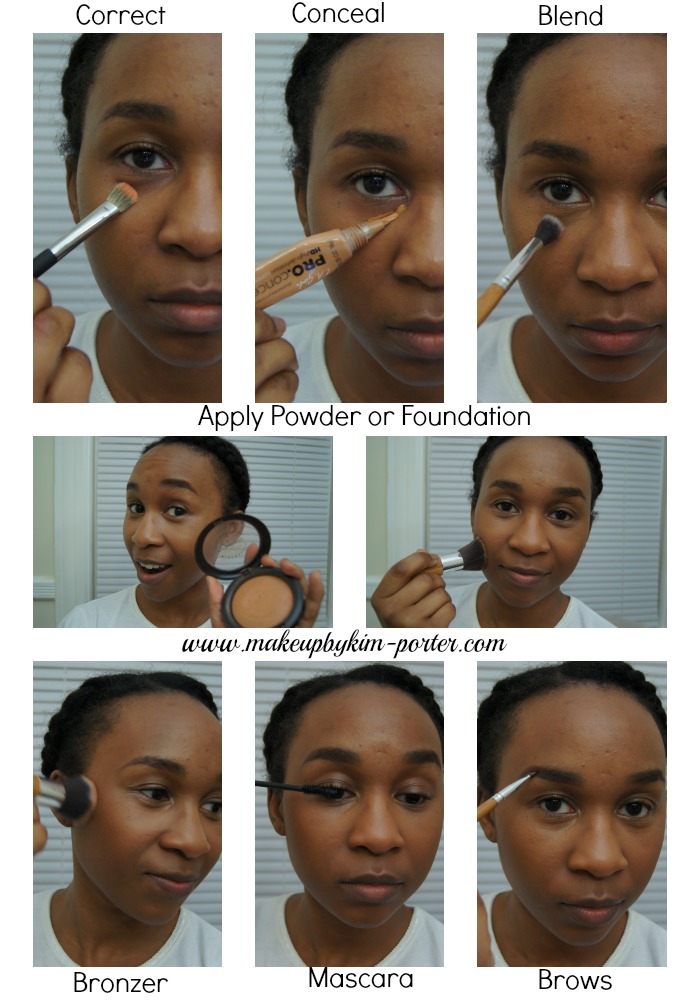
Concealer/Corrector

If you have discoloration, the best way to create a flawless face in under ten minutes, is by correcting any dark or red areas (under your eyes, blemishes, pimples), and then add concealer.  Make sure you blend, blend, and blend some more!

Foundation and/or Powder

Next, I follow up with my favorite foundation and/or powder. You can see what my favorites are for winter in my previous winter beauty staples post. Unless it’s that time of the month, I, for the most part opt to only apply the MAC Mineralize Skinfinish Natural in shade ‘Dark’.  Afterwards, my skin looks amazingly natural, and polished.

Bronzer

To bring my face back to life, and add some dimension, I apply bronzer.  I’ve been using the Guerlain Terracotta Bronzing Powder (Shade #7 for the last six months).

Mascara

You do not need to add eye shadow, at least in my opinion, in order to create a flawless face in under 10 minutes.  Just curl your lashes and apply your favorite mascara.  You may line your eyes if you need/want to should time permit.

Brow product

I’ve said this numerous times, and I’ll say it again… I do not leave my house without my brows done. My favorite product has been the Anastasia Dip Brow used with an angled liner brush.  Sorry, you won’t find the Instagram-famous concealed, block brow here.

Lip product

After applying your favorite lip product, either plain gloss, a stain, or your favorite lipstick (I’m wearing ‘Rebel’ by MAC), you can congratulate yourself because you have successfully created a flawless face in under ten minutes.

Create a Flawless Face in Under 10 Minutes _ Before after

This look was simple to do, and as I promised, it took me under ten minutes to create it.  I don’t look like I’m wearing a ton of makeup; it’s a more refined, and polished me.

Have you perfected the art of how to create a flawless face in under ten minutes? If so, what do you use?

How to Clean your Makeup Brushes using Clean Brush Shampoo

How to clean your makeup brushes

I BOUGHT THIS | AFFILIATE LINKSPR SAMPLE


Putting on makeup is fun.  Playing in different colors, textures, and using different mediums.  And then there’s the clean up.  I can’t be the only person who dreads cleaning my makeup brushes. but I know that clean makeup brushes and tools are essential to any makeup artist or enthusiast for many reasons, which is why I’ve created this pictorial teaching you How to Clean your Makeup Brushes using Clean Brush Shampoo (review) and alcohol.

Why you should learn how to clean your makeup brushes

Not cleaning your makeup brushes are doing your skin, makeup and brushes a huge disservice.  In order for your makeup brushes and tools to perform effectively, and apply your makeup flawlessly, they must be clean.  Dirty brushes can lead to muddy looking, or streaky makeup.  Dirty brushes can also lead to breakouts since they tend to harbor bacteria and dead skin cells.  Additionally, if you’re a makeup artist, not keeping your brushes clean, and doing so in between clients can contaminate all of your makeup. Brushes, like anything else are also an investment, especially if you’re a makeup artist, so think of keeping them clean as protecting your investment. Dirty brushes do tend to lead to a shorter life expectancy for you brushes.

How to clean your makeup brushes

Things you need to clean your makeup brushes

First, you need a few items in order to clean your makeup brushes so make sure you have the following setup before hand.

Brush shampoo

70% Alcohol

Towel

Paper Towel

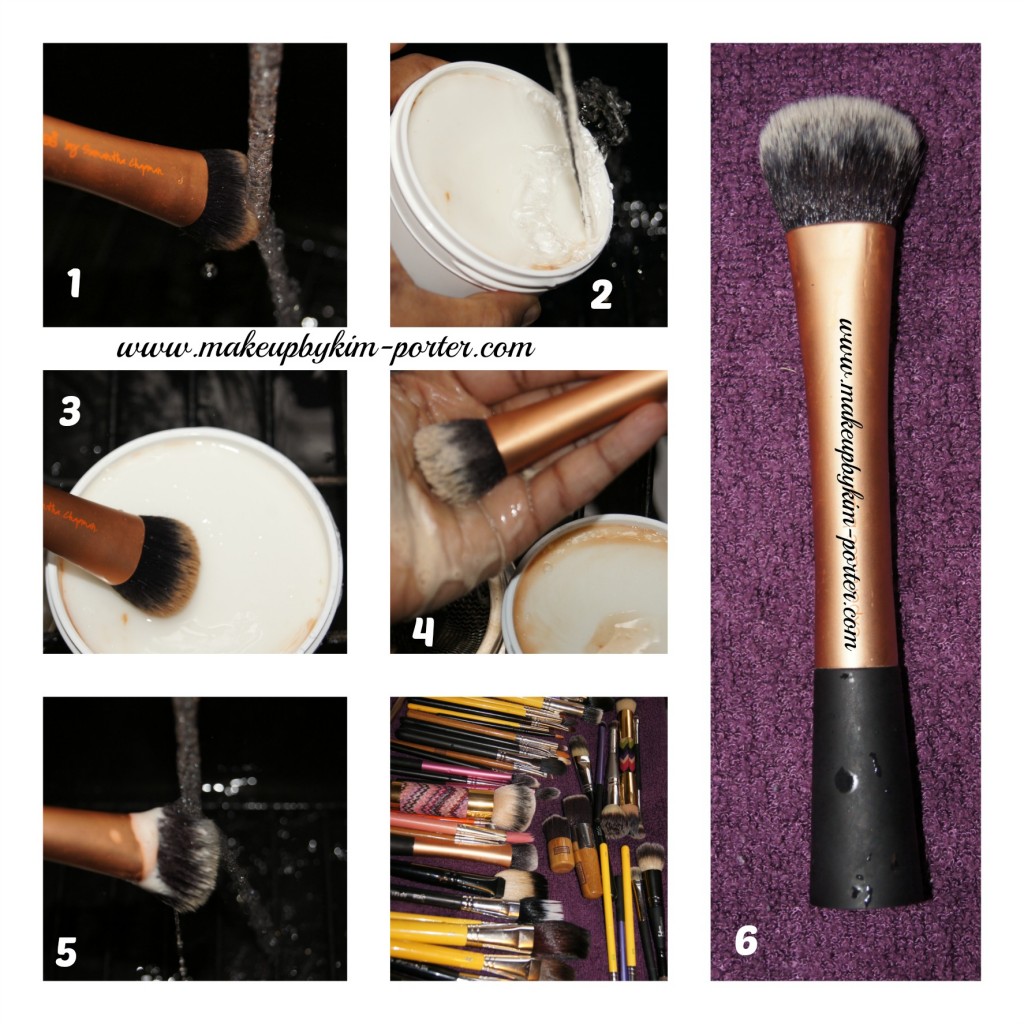
How to clean your makeup brushes pictorial

Now, let’s get to how to clean your makeup brushes

1. Wet the brush with lukewarm water with the brush head facing down.

Remember:  Do not wet past the ferrule since continued saturation of the ferrule, overtime can cause the glue to weaken, thus leading to the brush head  detaching from the handle.

2. Since I used Clean Brush solid brush shampoo,  I also wet that, too.

3. Swirl the dirty brush around in the jar, and then on your hand for extra dirty brushes.

4.  Rinse brush under lukewarm water until the water runs clear.

5.  Gently squeeze out excess water.

6.  Lie flat on towel to dry.

Usually, after my brushes are dry, I wet a paper towel with 70% alcohol, and then wipe down the brush handles.  I think this is a crucial step for makeup artists.

How to clean your makeup brushes


I hope this pictorial has been helpful in helping you to learn how to clean your makeup brushes.

How often are you deep cleaning your brushes? 

Review: I Cannot Put Down my Anastasia Beverly Hills Dipbrow Pomade in Chocolate

Disclosure: Affiliate Links.

SONY DSC
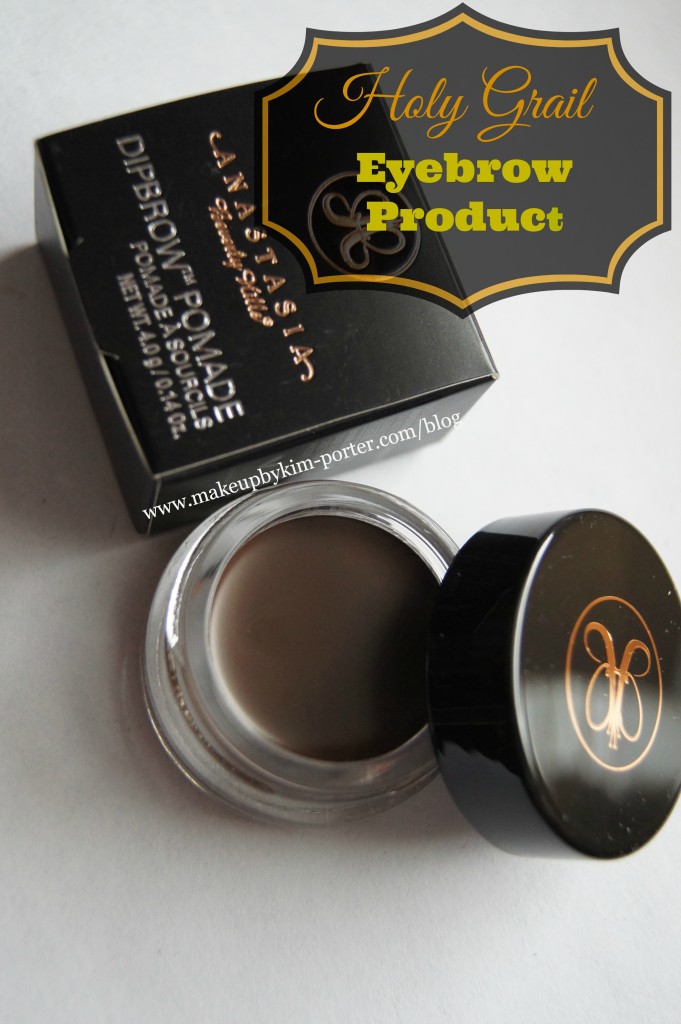
After reading many rave reviews from fellow makeup artists and beauty bloggers, as well as seeing photos of the Anastasia Beverly Hills Dipbrow Pomade in action, I decided to pick it up.  It took me a while to purchase the Anastasia Beverly Hills Dipbrow Pomade because it was always sold out on the Anastasia Beverly Hills website, and I, at first, refused to purchase it elsewhere, which meant I wouldn’t be able to use my discount.  And then, I couldn’t take it anymore;  I wound up purchasing the Dipbrow Pomade in Chocolate from Macys.com for $18.  Let me tell you, that was the BEST $18 I’ve spent.  I haven’t put down my Dipbrow since receiving it over one month ago.

Anastasia Beverly Hills Dipbrow Pomade Description:

Waterproof brow color ideal for sculpting, defining, and carving perfectly precise brows that won’t fade.  Smudge-free, creamy formula glides on skin and adheres to hair.  Must-have for oily skin and humid climates. Tighten cap to prevent drying.


Dipbrow Pomade Chocolate

My thoughts

Clearly, I am in-love with the Dipbrow Pomade.  I honestly use it every day, even if it’s the only makeup I wear for the day. It’s long-wearing even without sealing it with my model in a bottle brow set.  I’ve only had issues with it fading if I had my hair in my face (bangs).  Otherwise, it wore well throughout the day.

I like how smoothly the Dipbrow Pomade applies, and how natural it looks.  It’s easy to create a clean looking brow using the Dipbrow Pomade without having to “clean up” with concealer. Just check my instagram for proof.

There is a slight learning curve with using the Dipbrow Pomade, especially if you tend to be heavy handed when doing your makeup.  I suggest starting out first with very little on your brush (remove excess by dabbing the brush on the back of your hand).  Then, apply the Dipbrow Pomade in light, short strokes until you create the brow you want. I like my brows natural-looking, so I don’t fill-in the entire brow; I focus more on the tail end and fill-in only the areas that are sparse.

Since the Dipbrow Pomade is packaged in a pot, it’s easy for it to dry out.  To prevent that, ensure the cap is closed tightly after using. Also, when I use the Dipbrow, instead of leaving the cap off, I just remove a small amount, place it on the back of my hand and work from there.  That way, the product isn’t exposed longer than it needs to be, decreasing its chances for drying out.

There are three brushes I use with the Dipbrow Pomade: Make Up For Ever Brow Brush, Bdellium Tools #760, and an Everyday Minerals Angled Liner Brush.

Would I recommend the Dipbrow Pomade?

I love the Dipbrow Pomade so much that I am thinking about picking up a few more shades for my kit. I would definitely recommend picking this up if you’re in the market for a waterproof, long-wearing brow product that allows you to create a natural-looking, well-sculpted brow.  Since the Dipbrow Pomade is waterproof, it’s perfect for the summer, beach vacations etc.  Oh and, Dipbrow works double duty! You can also use it as eyeliner.

The Dipbrow Pomade is available in five shades: Auburn, Blond, Chocolate, Dark Brown, and Ebony.


Dipbrow
ShopStyle


Have you tried the Anastasia Beverly Hills Dipbrow Pomade?

What is your favorite brow product?

Disclosure: Affiliate Links.