This post ties into my post from last week, Choosing the right color foundation. As with foundation, women have issues with finding the right shade of concealer not realizing that there are different concealers for different skin issues. In this post, I will talk about how you can choose which concealer/corrector will work best for you and the blemish or skin condition you are trying to make dissapear.
Concealers are meant to cover blemishes, bruises, birthmarks, dark circles, redness etc that you do not want people to see. Concealers usually have less coverage than most foundations, but there are full-coverage concealers. They can be dabbed onto the face directly to the blemish with your finger or a brush.
Concealers come in many different shades. There are neutral colors that blend well with your skintone, and others in contrasting tones used to hide varying blemishes.
Remember: When buying a concealer or corrector, always test the color on the area you are trying to cover.
I’m going to start off with color correctors. These should not be applied alone, but covered with a concealer and/or foundation.
Neutralizing Colors (Colours opposite the color wheel)
Beige/White concealer – makes dark circles less prominent & brighten dull skin
Green– used for rosacea/redness from a pimple/breakout
Purple – used to normalize yellow-colored imperfections, such as yellow bruises. It can also help conceal very dark under-eye circles & dark spots on bronze skintones.
Yellow – used to conceal bluish bruises, under-eye circles, and mild red tones on the face; bruise, sun damage, dark spots
Orange – works best with darker complexions to cover blue tones, such as bruises, veins, and dark circles
Make Up For Ever 5 Camouflage Corrector Palette – $36 at Sephora
Graftobian HD Glamour Creme Palette Corrector Shades – $21.99
Concealers should be close to your skintone, and at least 1 to 2 shades lighter than your skintone depending on the look you’re going for. I generally use a shade or two lighter if I want my eyes to be brighter, and add my shade of foundation to it. Otherwise, I just go with a concealer in my same color.
Concealers come in
1. Liquid – usually dewy & sheer. (I use MUFE Full Coverage Liquid Concealer)
2. Stick (cream) – Varies in moisture content. More opaque coverage.
3. Pot (cream) – More opaque, great for maximum coverage. (I use MAC Studio Finish Concealer)
4. Pencil (solid dry cream) – Best for small areas like around the lips or for touch-ups.
How to apply:
Note: Use a light hand. You can always build up the needed/wanted coverage. You do NOT want it to look caked on!
1. Dot a neutralizing concealer on carefully and blend with your fingertips slightly past the edges of the blemishes. I use my Sigma SS24 blending brush to blend out the edges of the concealer.
2. Apply concealer that matches the color of your skin over the color correcting concealer. (You can skip this and apply foundation if you want). Again, blend out lines.
3. Set with a powder. I use ben nye’s banana powder. I got mine from Alcone Co for $7. This is a bargain & works better than top expensive brands.
4. apply your foundation (powder, cream or liquid). Make sure you pat on the foundation with a sponge over the concealed areas to avoid moving it.
5. Set with your favorite powder.
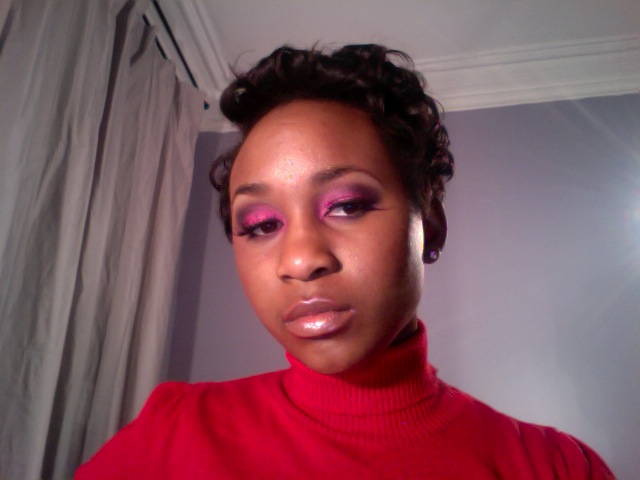
Makeup by Kim Porter


